Circular Sprang Warps
Using a circular warp makes it possible to make a piece twice as long as your frame - very convenient! It helps if the crossbars of your frame are thick, to keep the front and back layers separate.
Wrap the warp around and around the entire frame. Work the sprang only on the front layer - the half of the warp that is on the front of the frame. Push the linkings around to the back. They won’t undo each other- a bit like magic! It helps to use something smooth like a knitting needle in each shed to slide it around to the back. It’s a bit difficult to get the tension exactly right so that there aren’t any little loops at the central join. Work until you run out of room, pushing the loops back around to the growing edges of the fabric. When done, you need to actually cut the warp and finish it somehow, unlike sprang done in one layer.
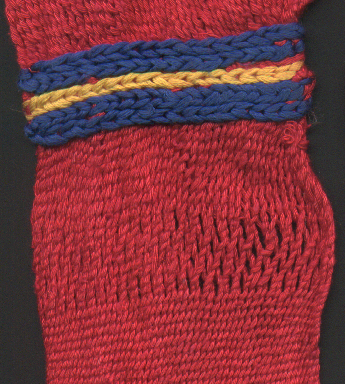
My large sprang frame has an adjustable top, so that I can change the size of a circular warp. This baldric was done on a circular warp. The embroidery covers the central join - I finally decided it was too much hassle to completely eliminate all the tensioning irregularities, and in a fabric that fine and tight, the loops were bothersome.

Sprang frame
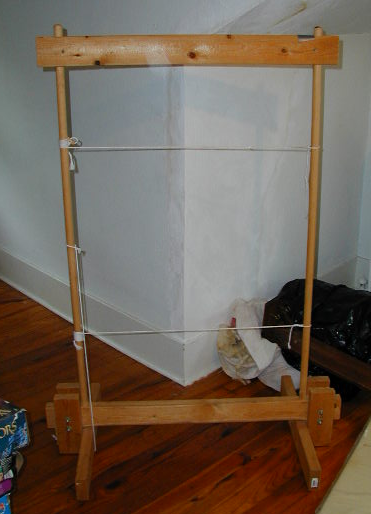
My large sprang frame was designed for use with both flat and circular sprang waps. It’s free-standing, and about 4 feet tall. When using a flat warp, the two cords are adjusted to be the appropriate distance apart and the warp run around them. The third cord, hanging down in the photo, can be put thru the current shed and tied to the opposite bar if I need to stop before finishing the fabric.
For a circular warp, the upper crossbar can be slid down the posts to position it at the right height. The upper and lower crossbars are made from 2x4 lumber. The outer edges were rounded and smoothed so the warp would slide over them. There are two bolts, not shown, that tighten the upper crossbar to the sidepieces to hold it in place.

